giovedì 8 giugno 2023
AlphaDev Solves Algorithms Faster Than Humans
mercoledì 31 maggio 2023
Repair slave in MySQL GTID replication, after fatal error 1236 (slave has more GTIDs than the master)
For repairing a broken slave after fatal error 1236.
Last_IO_Error: Got fatal error 1236 from master when reading data from binary log: 'Slave has more GTIDs than the master has, using the master's SERVER_UUID. This may indicate that the end of the binary log was truncated or that the last binary log file was lost, e.g., after a power or disk failure when sync_binlog != 1
slave# stop slave for channel 'mymaster';
slave# reset slave for channel 'mymaster';
slave# set gtid_next='automatic';
slave# change master to master_auto_position=1 for channel 'mymaster';
slave# start slave for channel 'mymaster';
slave# show slave status for channel 'mymaster'\G
lunedì 19 dicembre 2022
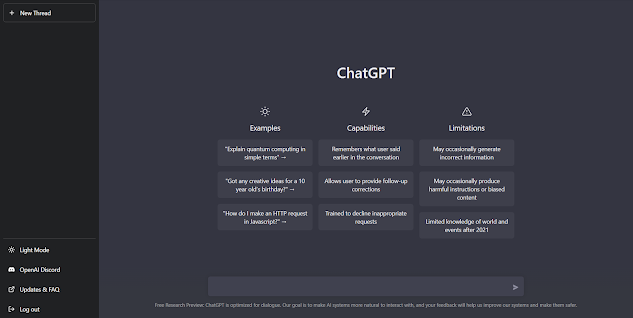
OpenAI ChatGPT
ChatGPT, which stands for Chat Generative Pre-trained Transformer, is a chatbot developed by OpenAI. ChatGPT is built on top of OpenAI's GPT-3.5 family of large language models, and is fine-tuned with both supervised and reinforcement learning techniques.
ChatGPT was launched as a prototype in November 2022, and quickly garnered attention for its detailed responses and articulate answers across many domains of knowledge.
It was fine-tuned on top of GPT-3.5 using supervised learning as well as reinforcement learning. Both approaches used human trainers to improve the model's performance. In the case of supervised learning, the model was provided with conversations in which the trainers played both sides: the user and the AI assistant. In the reinforcement step, human trainers first ranked responses that the model had created in a previous conversation. These rankings were used to create 'reward models' that the model was further fine-tuned on using several iterations of Proximal Policy Optimization (PPO). Proximal Policy Optimization algorithms present a cost-effective benefit to trust region policy optimization algorithms; they negate many of the computationally expensive operations with faster performance. The models were trained in collaboration with Microsoft on their Azure supercomputing infrastructure.
martedì 5 aprile 2022
Pathways Language Model (PaLM): Scaling to 540 Billion Parameters for Breakthrough Performance
Google AI introduced the 540 billion parameter Pathways Language Model. Trained on two Cloud #TPU v4 pods, it achieves state-of-the-art performance on benchmarks and shows exciting capabilities like mathematical reasoning, code writing, and even explaining jokes. https://goo.gle/3j6eMnK
PaLM demonstrates the scaling capability of the Pathways system to thousands of accelerator chips across two TPU v4 Pods by training a 540-billion parameter model efficiently with a well-studied, well-established recipe of a dense decoder-only Transformer model. Pushing the limits of model scale enables breakthrough few-shot performance of PaLM across a variety of natural language processing, reasoning, and code tasks.
PaLM paves the way for even more capable models by combining the scaling capabilities with novel architectural choices and training schemes, and brings us closer to the Pathways vision:
<<Enable a single AI system to generalize across thousands or millions of tasks, to understand different types of data, and to do so with remarkable efficiency.>>
giovedì 17 giugno 2021
How to Kill MySQL Queries
The command SHOW PROCESSLIST lists all the open connections to the server
mysql> SHOW PROCESSLIST;
In order to kill a thread completely, use the KILL command followed by the thread ID returned by SHOW PROCESSLIST:
mysql> KILL 1234;
martedì 20 aprile 2021
Repair slave in MySQL GTID replication, after fatal error 1236 (master has purged binary logs)
For repairing a broken slave after fatal error 1236.
Last_IO_Error: Got fatal error 1236 from master when reading data from binary log: 'The slave is connecting using CHANGE MASTER TO MASTER_AUTO_POSITION = 1, but the master has purged binary logs containing GTIDs that the slave requires.'
slave# reset master;
slave# source /pathto/dump.sql;
slave# start slave for channel 'mymaster';
slave# show slave status for channel 'mymaster'\G
Here is another useful tutorial, if the problem persists
venerdì 18 settembre 2020
Demo of OpenAI GPT-3
giovedì 2 aprile 2020
Folding@Home contro il COVID-19
lunedì 29 ottobre 2018
Repair slave in MySQL GTID replication
Stop the slave.
SET GTID_NEXT="AUTOMATIC";
stop slave;
Find the point where replication broke.
show slave status\G;
Now find "Executed_Gtid_Set". Example value:
Executed_Gtid_Set: 44d966cc-d84d-11e8-be8d-20677cd3f384:1-2872
Increase of one step to 2873
SET GTID_NEXT="44d966cc-d84d-11e8-be8d-20677cd3f384:2873";
Now start the slave.
start slave;
show slave status\G;
Here is another useful tutorial, if the problem persists
https://www.percona.com/blog/2013/02/08/how-to-createrestore-a-slave-using-gtid-replication-in-mysql-5-6/
Continue the loop until no error occurs. Enjoy
lunedì 30 aprile 2018
Choosing a visual to represent data
Here is a handy diagram that can be used to determine the right chart type to use in your data visualization.
venerdì 10 novembre 2017
How To Secure MySQL Replication Using SSH
http://makandracards.com/makandra/573-mysql-replication-how-to
http://www.somacon.com/p567.php
Bi-directional SSH tunnel
local$: ssh -N -R 33061:localhost:3306 remote_host_ip
remote$: ssh -p 33061 localhost
Create/restore a slave using GTID replication
https://www.percona.com/blog/2013/02/08/how-to-createrestore-a-slave-using-gtid-replication-in-mysql-5-6/
MySQL Multi-Source Replication
http://www.xenialab.it/meo/web/white/oracle/myrepl_multi.htm
If we have a chain of slaves, it's important to enable slave update logging, on config file:
log-slave-updates = 1
giovedì 27 aprile 2017
Unable to install Certbot
# apt-get install -t jessie-backports certbot python-certbot-apache Reading package lists... Done E: The value 'jessie-backports' is invalid for APT::Default-Release as such a release is not available in the sources
Solution:
You should first enable backports, see https://backports.debian.org/Instructions
http://guide.debianizzati.org/index.php/Il_repository_Backports
martedì 29 novembre 2016
Recupero dati da scheda micro SD, e non solo...
Per scaricare PhotoRec, collegati al sito del programma e clicca sulla voce corrispondente al sistema operativo installato sul tuo PC (scegli ”Windows” indipendentemente se usi una versione di Windows a 32 o 64 bit). Al termine del download, apri l’archivio zip che contiene PhotoRec e TestDisk, estraine il contenuto in una cartella di tua scelta e avvia l’eseguibile qphotorec_win.exe.
Nella finestra che si apre, espandi il menu a tendina collocato in alto e scegli l’unità relativa al dispositivo da cui intendi recuperare i dati. Clicca quindi sulla voce corrispondente alla partizione principale del drive e clicca sul pulsante File Formats per selezionare le tipologie di file che vuoi recuperare (meno tipologie di file selezioni, minore sarà il tempo impiegato dal software per svolgere il suo lavoro).
Successivamente, metti il segno di spunta accanto alle opzioni Whole e FAT/NTFS/HFS+/ReiserFS, fai click sul pulsante Browse e seleziona la cartella in cui PhotoRec deve salvare i file che riesce a recuperare. Per concludere, clicca sul pulsante Search e attendi che venga completato il recupero dei file cancellati, i quali verranno salvati automaticamente nella cartella selezionata.

giovedì 8 settembre 2016
ripristino MySQL corrotto
- Se non è disponibile un dump dei dati, cercare di fare avviare il servizio di MySQL
- Se non si avvia, modificare my.cnf aggiungendo innodb_force_recovery = 6, sotto [mysqld], partendo da un valore basso fino ad un massimo di 6
- Eseguire il dump di tutto: mysqldump --force --compress --triggers --routines --create-options -uUSERNAME -pPASSWORD --all-databases > /backup/dump.sql
- Fermare il database: mysqladmin -uUSERNAME -pPASSWORD shutdown
- Rimuovere tutti i file dalla directory dei dati: rm -rf /path/dati/
- Ricreare la directory dei dati con permessi 755 ed owner mysql:mysql
- Inizializzare il database col comando shell#: mysqld --initialize
- Avviare il servizio senza il controllo credenziali: mysqld --skip-grant-tables
- Importare i dati col comando shell#: mysql -uroot --compress -p < /backup/dump.sql
- Modificare la password di root
- # mysql -uroot mysql
- $mysql> UPDATE user SET Password=PASSWORD('my_password') WHERE user='root'; oppure se non funziona...
- UPDATE user SET authentication_string=password('my_password') WHERE user='root';
- $mysql> FLUSH PRIVILEGES;
- Riavviare il servizio: service mysql restart
mercoledì 1 giugno 2016
Resize partition in Debian
umount /dev/vdb1
cgdisk /dev/vdb
- remove partiton
- create a new partition
partprobe
resize2fs /dev/vdb1
If cgdisk is not installed
apt-get install gdisk
martedì 10 maggio 2016
venerdì 6 maggio 2016
Install SSL Certificate on Apache for Debian
OpenSSL installed and updated (should be installed by default)
apt-get update
apt-get upgrade opensslApache will be our HTTPS server. To install it, run the following:
apt-get install apache2Enable the Apache SSL module
a2enmod sslThe default Apache website comes with a useful template for enabling SSL, so we will activate the default website now
a2ensite default-sslConfigure Apache to Use SSL
Edit server configuration file
nano /etc/apache2/sites-enabled/default-ssl.confLocate the section that begins with <VirtualHost _default_:443>.
Add a line with your server name directy below the ServerAdmin email line. This can be your domain name or IP address:
ServerAdmin webmaster@localhost
ServerName example.com:443Find the following two lines, and update the paths to match the locations of the certificate and key. If you purchased a certificate or generated your certificate elsewhere, make sure the paths here match the actual locations of your certificate and key:
SSLCertificateFile /etc/apache2/ssl/apache.crt
SSLCertificateKeyFile /etc/apache2/ssl/apache.keyRestart Apache to put these changes into effect
service apache2 restart
mercoledì 16 marzo 2016
Prestashop friendly url
a2enmod rewrite
nano /etc/apache2/sites-enabled/000-default.conf
<Directory /var/www/html>
Options Indexes FollowSymLinks MultiViews
AllowOverride All
Order allow,deny
allow from all
</Directory>
Riavviare Apache:
service apache2 restart
venerdì 11 marzo 2016
Calculating Median with MySQL
select avg(test_val) as median from
(
select @counter:=@counter+1 as row_id, t1.test_val
from test100 t1, (select @counter:=0) t2
order by t1.test_val
) o1
join
(
select count(*) as total_rows
from test100
) o2
where o1.row_id in (floor((o2.total_rows + 1)/2), floor((o2.total_rows + 2)/2))
Calcolare la Mediana con MySQL
select avg(test_val) as median from
(
select @counter:=@counter+1 as row_id, t1.test_val
from test100 t1, (select @counter:=0) t2
order by t1.test_val
) o1
join
(
select count(*) as total_rows
from test100
) o2
where o1.row_id in (floor((o2.total_rows + 1)/2), floor((o2.total_rows + 2)/2))